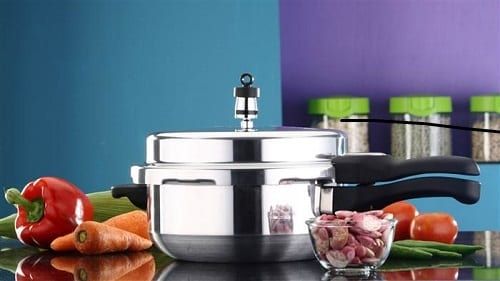
The slow food movement is great, and there is a certain timeless satisfaction in watching, smelling, and knowing your Sunday dinner is gently simmering in the oven.
But what if you could have that same satisfaction and delicious outcome in a fraction of the time, and with only one pot to clean, save energy and money, improve the flavor, texture, and nutritional value of your food? No contest, right? The game-changer that is going to do this for you is the modern day pressure cooker. You can make a roast, a pot of beans, brown rice, soups and stews every night of the week, so easily, and so quickly that the pressure cooker will be your new best friend.
By cooking your pot roast under pressure for 35 or 40 minutes, instead of the 3 plus hours using conventional methods, you’re not only preserving vitamins and minerals, you’re also preserving mucho flavor. Pressure cooking also makes grains and beans way more digestible by reducing the amount of those pesky anti-nutrient bad guys (like lectins and phytic acid).
Now that you are (hopefully) sold on the benefits of pressure cooking, here are some tips and guidelines to set you up for immediate culinary success.
1. Get with the 21st century. Toss or donate that whistling rattling device you inherited–the one that once made your mom’s kitchen ceiling look like something from “The Exorcist”—and invest in a modern spring valve one. They are completely different beasts, especially the electronic ones that employ push-button technology (but the stovetop ones are great, too). And quiet. And very, very, safe. So shop around, invest in a quality, stainless steel device that has at least 6 to 8 liters capacity—anything smaller will be very limiting.
2. Do some reading. Sit down with the manual and peruse it thoroughly, same goes for recipes. Use recipes specifically designed for pressure cooking, especially if you’re new to it. Pressure cooking isn’t difficult, but it requires precision.
3. Don’t overfill. Half full is the recommended amount for beans or other food that expands as it cooks, and two-thirds full for everything else—any more and the food won’t cook properly. There should always be at least 1 cup of liquid, but stop before the cooker is half way filled with it. Keep in mind that little to no liquid is evaporated, so you want to keep the flavors concentrated and working their juicy magic. Until you’ve got crazy pressure cooker skills, be meticulous about following all the recipe’s measurements. And a little goes a long way when it comes to the amount of wine or other alcohol you should use (so pour yourself that extra glass and put your feet up while the cooker makes dinner for you!)
4. Browning = good. Caramelization is where it’s at in terms of flavor, so don’t deny your meat or vegetables the chance to really shine. If you’re using a stovetop pressure cooker, you can do all the browning right in the cooker, over medium heat with just a bit of oil. Then, just as you normally would, remove the meat and deglaze with a small amount of water, wine or stock, scraping up all the succulent bits on the bottom. Allow the liquid to reduce and concentrate before everything gets put back, so you aren’t adding extra liquid, just extra flavor. Follow the same procedure for an electric pressure cooker– just use the browning setting. What could be easier?
5. Size matters. Denser, slower cooking ingredients should be cut in smaller pieces than quick cooking ones. If you’re using a recipe specifically developed for pressure cooking, do heed the cutting size specifications.
6. Different ingredients require different times. Modern pressure cookers allow you to quickly reduce pressure so you can add your potatoes in after your meat has been cooking for a while. Again, follow, the recipe’s specifications, but know this is an option.
7. A great tip for electric stovetop cooking: Keep two burners going — one high and the other medium/low, because you initially want high heat to bring the pressure up, and don’t want to wait while the slower second burner heats up. (You’re welcome )
8. Make it sexy. A brief finish under the broiler can take your dish over the edge. You’ve achieved falling-off-the-bone, moist and delectable ribs in your pressure cooker, but a little glaze in a hot oven is where the next-level sticky goodness comes into play. Oh, yeah.
9. Use your noodle. Not everything is best suited to pressure cooking. Fish, for example, is generally too delicate for the brawn of your cooker. Surprisingly, risotto plays nicely with pressure cookers (this writer/chef has never tried it, but many swear by it). And while most pressure-cooked vegetables can be great and more nutritious, a little too long and they turn to mush, so do monitor them. Which leads us to…
10. Timing is everything. If you’re using a model that doesn’t have a built-in timer, then start watching your kitchen timer (yes, you need one) only once the target pressure is reached. After that, you’re going to lower the heat just enough to maintain the pressure for the allotted cooking time. A minute or two can make a big difference in the high-speed world of pressure cooking, so keep your timer where you can see it.
11. Know when to hold ’em. Be sure to add any dairy ingredients at the very end because they will curdle under pressure. Throw your fresh herbs in after cooking, too—the residual heat is more than enough, and you won’t lose the “herbaciousness.” Always season at the end, as well.
Carolyn Grifel is a personal chef who got her training at The French Culinary Institute, and a writer who graduated from The Columbia University School of Journalism. She lives in Brooklyn with her family and a border collie rescue named Lucky.


